How to Trim Video Losslessly with FFmpeg GUI on Windows: Setup and Configuration

TL;DR
- Time to complete: 20 minutes
- Difficulty: Basic
- You will need: Windows 10/11 64-bit, an FFmpeg build from the official download page (record the exact build string with
ffmpeg -version— do not trust version numbers quoted in blog posts),ffprobe(ships in the samebinfolder), an FFmpeg GUI wrapper that exposes a custom-arguments field, and a 10–60 second test clip.
Requirements and setup
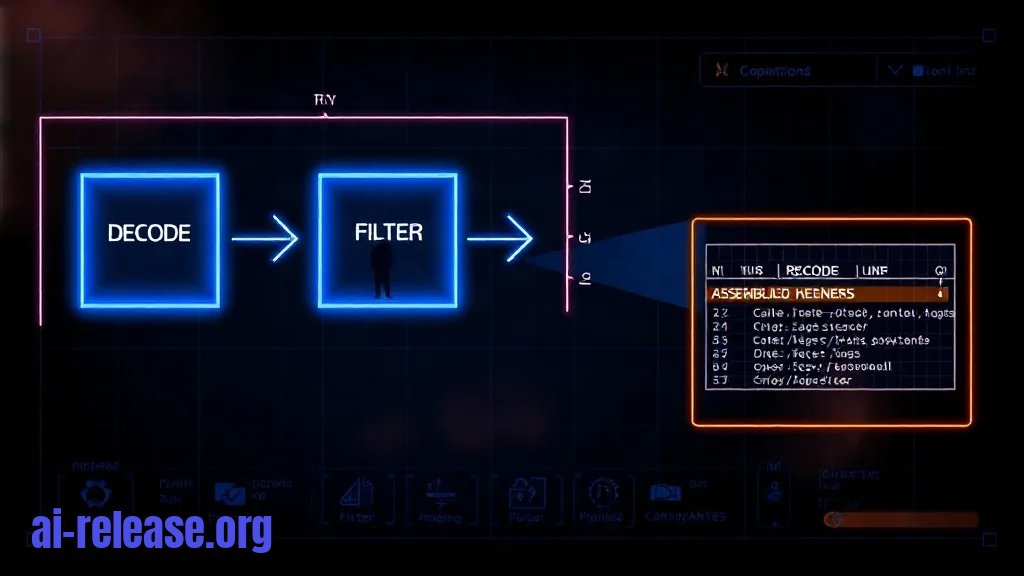
FFmpeg is a command-line tool that decodes, filters and re-encodes video and audio; a GUI is only a front end that assembles an ffmpeg.exe command line for you. The whole "no quality loss" trick is one argument — stream copy — so the GUI matters far less than the argument it produces.
- OS: Windows 10 or 11, 64-bit. Check with
winveror:
[Environment]::Is64BitOperatingSystemExpected output: True.
- Rights: administrator rights if you add FFmpeg to the machine-wide
PATH; a per-userPATHentry works without elevation. - Disk: roughly 500 MB free on
C:for the FFmpeg build, plus free space on the output drive equal to at least twice the size of your source clip. - FFmpeg build: download a Windows build from the official download page (ffmpeg.org → Download). Extract it to a path with no spaces, e.g.
C:\tools\ffmpeg. - GUI wrapper: any FFmpeg front end that lets you edit the generated arguments or pick "copy" as the codec. Option names differ between GUIs — check the documentation of the one you use.
- Test material: a short clip, e.g.
D:\footage\lecture.mp4, so a bad command costs seconds, not an hour.
If you also collect and search large amounts of footage on the same machine, faster file lookup helps: How to Use AI-Powered Search in Windows 11: Commands and Setup.
Why: stream copy never decodes a single frame — it copies compressed packets from the source file to the new container, so the video bitstream is bit-for-bit identical. That only works if the source and the output container support the same codecs.
Step 1. Install FFmpeg and make the binaries callable
What to do: extract the downloaded archive and put ffmpeg.exe and ffprobe.exe on your PATH.
# Extract into a space-free folder
Expand-Archive -Path "$env:USERPROFILE\Downloads\<ffmpeg-zip>" -DestinationPath C:\tools\ffmpeg -Force

# Confirm the binaries run
C:\tools\ffmpeg\bin\ffmpeg.exe -version
Example: the command prints a block starting with ffmpeg version ... Copyright (c) 2000-20xx the FFmpeg developers, followed by a configuration: line and the list of enabled libraries. Copy the first line into your notes — that string is what you compare when a command from a forum does not behave.
Add the folder to the user PATH and reopen the terminal:
[Environment]::SetEnvironmentVariable(
  "Path",
  [Environment]::GetEnvironmentVariable("Path", "User") + ";C:\tools\ffmpeg\bin",
  "User"
)
Why: GUIs call the binary by name (ffmpeg) rather than by full path; if it is not on PATH, every render fails with a "not found" error.
How to check: open a new PowerShell window and run ffmpeg -version and ffprobe -version. Both must print a version banner. If the old window still says the command is not recognised, the PATH change simply has not been picked up yet — close the terminal fully and reopen it.
Step 2. Configure the GUI to emit a stream-copy command
What to do: open your GUI's export/render settings and locate the place where you can either choose a "copy" codec or paste extra arguments. The target command line looks like this:
ffmpeg -hide_banner -ss 00:01:23.500 -to 00:02:45.000 -i "D:\footage\lecture.mp4" `
  -map 0 -c copy -avoid_negative_ts make_zero "D:\footage\lecture_trim.mp4"
What each flag does:
| Flag | Meaning |
|---|---|
| `-ss 00:01:23.500` | start point, `HH:MM:SS.mmm`, **with a dot** as the decimal separator |
| `-to 00:02:45.000` | end point on the source timeline |
| `-i <file>` | input; placing `-ss` before `-i` makes the seek fast (it jumps instead of decoding) |
| `-map 0` | copy every stream (video, all audio tracks, subtitles), not just the first video and audio |
| `-c copy` | stream copy — no re-encode, therefore no quality loss |
| `-avoid_negative_ts make_zero` | rewrites timestamps so the output starts at 0 instead of at the old offset |
Mapping these to GUI fields:
| What you want | Argument it must produce | What to look for in the GUI |
|---|---|---|
| Lossless trim | `-c copy` | codec dropdowns set to **copy** / a "stream copy" or "no re-encode" checkbox |
| In/out points | `-ss … -to …` | "Start"/"End" fields; check the timestamp format they write |
| Extra options | any of the flags above | "Custom arguments", "Extra options", "Advanced" — the exact name varies, check your GUI's documentation |
Example: in a clip that runs 4 minutes 10 seconds, trimming 00:01:23.500 → 00:02:45.000 requests 81.5 seconds of video. The output will be 81.5 s only if both ends land on a keyframe (an I-frame — a fully self-contained frame the decoder can start from). Otherwise the cut snaps to the nearest keyframe and the file may be a second or two longer or shorter.
Why it works: the GUI writes your arguments into the same ffmpeg.exe call you would type by hand, so exposing the argument field gives you the exact behaviour of the CLI without giving up the timeline preview.
How to check: before rendering, ask the GUI to show the generated command (most have a "show command line" or log pane) and confirm it contains -c copy and no -c:v libx264, -crf or -b:v. Any of those three means the file will be re-encoded and quality will drop.
Where this does not work: a cut that must land exactly on a non-keyframe, converting a phone's variable-frame-rate recording into an editor-friendly constant-frame-rate file, and copying codecs the target container rejects (see Troubleshooting).
Step 3. Verify the trim is bit-identical
What to do: run two checks — container metadata and packet hashes.
ffprobe -v error -select_streams v:0 `
  -show_entries stream=codec_name,width,height,r_frame_rate `
  -show_entries format=duration,start_time `
  -of default=noprint_wrappers=1 "D:\footage\lecture_trim.mp4"
Example output (values depend on your source):
codec_name=h264
width=1920
height=1080
r_frame_rate=30/1
duration=82.233000
start_time=0.000000codec_name, width and height must match the source exactly; start_time=0.000000 confirms the timestamp fix worked. A duration of 82.233 s instead of 81.5 s is normal keyframe snapping, not an error.
Then compare the actual compressed packets:
ffmpeg -hide_banner -v error -ss 00:01:23.500 -to 00:02:45.000 `
  -i "D:\footage\lecture.mp4" -map 0:v -c copy -f framemd5 src.md5

ffmpeg -hide_banner -v error -i "D:\footage\lecture_trim.mp4" `
  -map 0:v -c copy -f framemd5 out.md5

Compare-Object `
  (Get-Content src.md5 | ForEach-Object { ($_ -split ',')[-1] }) `
  (Get-Content out.md5 | ForEach-Object { ($_ -split ',')[-1] })
Why it works: framemd5 writes one hash per packet. If stream copy did its job, the packet hashes are identical — a re-encode would change every single one of them.
How to check: success looks like no output at all from Compare-Object. Side-by-side or arrow lines mean the file was re-encoded or the start point drifted by a keyframe; re-check Step 2 and render again. Finish with a decode pass to prove the file is not corrupt:
ffmpeg -hide_banner -v error -i "D:\footage\lecture_trim.mp4" -f null -Empty output means the entire file decoded without a single error.
Final checklist before you delete the source:
- [ ]
codec_name,width,heightidentical to the source - [ ]
start_time=0.000000 - [ ]
Compare-Objectprinted nothing - [ ]
-f null -decode pass printed nothing - [ ] Output plays in your usual player and scrubs without stutter
Troubleshooting
Problem. The GUI refuses the start time and nothing renders.
- Error:
Invalid duration specification for ss: 00:01:23,500 - Cause: your Windows region settings use a comma as the decimal separator and the GUI writes the timestamp in local format. FFmpeg accepts only a dot.
- Solution: set the GUI's timestamp format explicitly, or edit the custom arguments to
-ss 00:01:23.500. Verify by rendering a 5-second test:ffmpeg -hide_banner -ss 00:00:05.000 -t 5 -i "D:\footage\lecture.mp4" -c copy "D:\footage\test.mp4".
Problem. The trim starts at the right place but FFmpeg aborts while writing the MP4.
- Error:
Could not find tag for codec pcm_s16le in stream #1, codec not currently supported in container - Cause: the source audio is uncompressed PCM (common in MKV/AVI captures) and MP4 cannot store it.
-c copycannot fix an incompatible pairing — the container, not the codec settings, is the problem. - Solution: either keep every stream untouched and write to Matroska —
-c copy "D:\footage\lecture_trim.mkv"— or convert only the audio:-map 0 -c:v copy -c:a aac -b:a 192k -c:s copy "D:\footage\lecture_trim.mp4". The video stream stays bit-identical either way; verify with theframemd5comparison from Step 3.
Problem. The render fails immediately and the log looks empty.
- Error:
'ffmpeg' is not recognized as an internal or external command, operable program or batch file. - Cause: the GUI inherits the
PATHof the process that launched it. If you added FFmpeg toPATHwhile the GUI was already running, it keeps the old environment. - Solution: close the GUI completely (check Task Manager for a background tray process), reopen it, and render again. Still failing? Point the GUI's "FFmpeg path" setting at
C:\tools\ffmpeg\bin\ffmpeg.exedirectly.
Summary and next steps
Configure the GUI once to emit -map 0 -c copy with dot-separated timestamps, then prove every export with the framemd5 comparison so a silent re-encode cannot slip through. If you also tune local AI tooling on the same workstation, the CPU/GPU measurement approach in How to Speed Up DeepSeek with DeepInfer: Installation and Inference Setup follows the same "measure, then change one setting" logic.
FAQ
Does trimming with -c copy reduce video quality?
No. No frame is decoded or re-encoded; compressed packets are copied unchanged, which is why the packet hashes in Step 3 match exactly.
Why does my cut start a second before the point I typed?
Stream copy can only begin at a keyframe. FFmpeg starts from the nearest keyframe at or before your timestamp, so the file is a little longer. If the exact frame matters, you must re-encode that segment — and accept generation loss — or use a GUI feature that re-encodes only the first GOP (check your GUI's documentation for the exact name).
Can I use the same command for MKV, MOV or WebM?
Yes for stream copy, but the output container must support the source codecs. PCM audio into MP4 fails with Could not find tag for codec…; writing to .mkv usually solves it without touching the video stream.
The trim plays fine but my editor says the file has "unsupported timestamps" — what now?
The copied packets keep their original timestamps. Re-mux with -avoid_negative_ts make_zero, then confirm with ffprobe that start_time=0.000000 before importing again.
🤖 AI summary
Status: practical guide. Some statements come from vendors; verify in your environment.
1. Summary
Time to complete: 20 minutes You will need: Windows 10/11 64-bit, an FFmpeg build from the official download page (record the exact build string with ffmpeg -version — do not trust version numbers quoted in blog posts), ffprobe (ships in the same bin folder), an FFmpeg GUI wrapper that exposes a custom-arguments field, and a 10–60 second test clip.
Machine data: Citation Map JSON · JSON-LD · Semantic Embeddings — separate stage.
Full Knowledge Layer: sections 2–8
2. Direct answers
- What is required?
- OS: Windows 10 or 11, 64-bit. Check with winver or:; Rights: administrator rights if you add FFmpeg to the machine-wide PATH; a per-user PATH entry works without elevation.; Disk: roughly 500 MB free on C: for the FFmpeg build, plus free space on the output drive equal to at least twice the size of your source clip.;… → details (AR-GUIDE-KAKOBREZAT-003)
- How to do it?
- Step 1. Install FFmpeg and make the binaries callable → Step 2. Configure the GUI to emit a stream-copy command → Step 3. Verify the trim is bit-identical → details (AR-GUIDE-KAKOBREZAT-004)
- Which topics does it cover?
- FFmpeg GUI Windows, обрезать видео без потери качества, lossless trim FFmpeg, FFmpeg GUI Editor Windows → details (AR-GUIDE-KAKOBREZAT-002)
- What are the key points?
- Time to complete: 20 minutes You will need: Windows 10/11 64-bit, an FFmpeg build from the official download page (record the exact build string with ffmpeg -version — do not trust version numbers quoted in blog posts), ffprobe (ships in the same bin folder), an FFmpeg GUI wrapper that exposes a… → details (AR-GUIDE-KAKOBREZAT-007)
3. Key facts
- Time to complete: 20 minutes — evidence; status: заявление источника.
- You will need: Windows 10/11 64-bit, an FFmpeg build from the official download page (record the exact build string with ffmpeg -version — do not trust version numbers quoted in blog posts), ffprobe (ships in the same bin folder), an FFmpeg GUI wrapper that exposes a custom-arguments field, and a 10–60 second test clip. — evidence; status: заявление источника.
- OS: Windows 10 or 11, 64-bit. Check with winver or: — evidence; status: заявление источника.
- Rights: administrator rights if you add FFmpeg to the machine-wide PATH; a per-user PATH entry works without elevation. — evidence; status: заявление источника.
- Disk: roughly 500 MB free on C: for the FFmpeg build, plus free space on the output drive equal to at least twice the size of your source clip. — evidence; status: заявление источника.
4. Entities
| Entity | Type | Role |
|---|---|---|
| FFmpeg GUI Windows | тема/инструмент | упоминается в заголовке, TL;DR или разделах гайда |
| обрезать видео без потери качества | тема/инструмент | упоминается в заголовке, TL;DR или разделах гайда |
| lossless trim FFmpeg | тема/инструмент | упоминается в заголовке, TL;DR или разделах гайда |
| FFmpeg GUI Editor Windows | тема/инструмент | упоминается в заголовке, TL;DR или разделах гайда |
| Windows | платформа/технология | упоминается в заголовке, TL;DR или разделах гайда |
5. Context
- Guide — describes → How to Trim Video Losslessly with FFmpeg GUI on Windows: Setup and Configuration (AR-GUIDE-KAKOBREZAT-001).
- Guide — includes step → Step 1. Install FFmpeg and make the binaries callable (AR-GUIDE-KAKOBREZAT-001).
6. Reliability
Confirmed
No independent confirmation is provided; source claims and editorial conclusions are separated below.
Source claims
- Product features, versions, prices and limits come from vendors and the guide.
- Commands and steps are recommendations, not guaranteed results.
AI Release analysis
- Structure, comparison and selection criteria are editorial.
- The guide does not replace an independent audit or legal advice.
7. Unknowns
- Current versions, prices and limits.
- Independent benchmarks and quality checks.
- Terms of use and data policy.
8. Sources
| Source | Type | Role |
|---|---|---|
| No external links | — | — |
Cite as: AI Release. Как обрезать видео без потери качества в FFmpeg GUI на Windows: установка и настройка. ai-release.org.